Guides
6 parts of tire shop equipment, explained
Tire shop equipment and bay setup judged by sellable minutes: what to buy in what order, how to lay out the bay, and the safety program around it.
What to take away
- Judge every piece of tire shop equipment by the sellable bay minutes it adds or the damage it prevents. Nothing else justifies the money.
- Layout beats horsepower. Steps saved between the lift, the machine and the rack repeat on every job of every day.
- The building decides more than the catalog doesslab, ceiling, door width, power and air.
- Equipment that damages a customer's wheel costs more in one incident than the difference between a good machine and a cheap one.
- The safety program is part of the equipment plan, not a separate binder. Lifts, noise, dust and chemicals are the hazards a tire shop actually has.
Start from the building, not the catalog
Before you buy anything, measure the constraints you cannot change.
Site constraints to confirm first
- Floor slabthickness and lift specification
- Ceiling heightclearance with vehicle raised
- Door width and approachlargest vehicle
- Power servicecompressor, lift, machines
- Air supplyvolume and recovery, not pressure
- Drainage and floor finishnot slick
- Waste tire storagepermitted space
Start from the building
| Constraint | What to confirm | What it rules out if it fails |
|---|---|---|
| Floor slab | Thickness and specification the lift requires | The lift itself, which is the whole business |
| Ceiling height | Clearance with a full-size vehicle raised | Trucks, vans and lifted vehicles as customers |
| Door width and approach | The largest vehicle you intend to serve, turning in | Commercial and fleet work |
| Power service | What the compressor, lift and machines need | Machines you already ordered |
| Air supply | Volume and recovery, not just pressure | Two bays running at once |
| Drainage and floor finish | Water handling and a surface that is not slick | A shop that fails a safety inspection |
| Waste tire storage | Space that is permitted for it where you are | Volume work, since casings pile up fast |
A site that fails on slab or door width is not a bargain. It is a shop with a permanent ceiling on what it can accept.
The six parts of tire shop equipment
A tire shop runs on six core parts. The order below adds sellable minutes. Two extra categories follow the six.
Buy order, first to last:
The six parts
- Lift
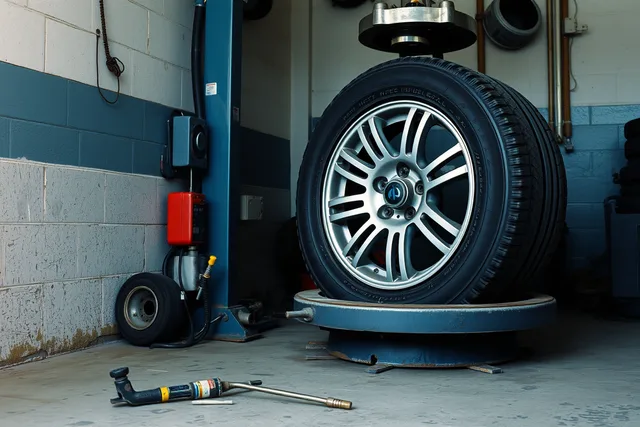
- Tire changer
- Balancer
- Torque tooling
- Sensor tooling
- Air and inflation
- Rack and staging
- Alignment and road-force balancing
1. Lift
Nothing else produces sellable minutes without it. Capacity rated for the heaviest vehicle you intend to serve, not the average one.
BendPak XPR-10A is a 10,000-lb two-post lift. Rotary Lift SPOA10 is a 10,000-lb asymmetric two-post. Typical installed price: $4,000 to $9,000, depending on capacity and slab work.
2. Tire changer
The wheel-protection features are the point. A machine that marks alloy wheels will cost you a customer's wheel and the argument that follows.
Hunter TC3500 is a swing-arm rim-clamp changer with plastic wheel protectors. Coats 5030 Apex is a rim-clamp changer with a powered bead breaker. Typical price: $3,000 to $8,000. Automated units like the Hunter Revolution can run $30,000 or more.
3. Balancer
Accuracy and cycle time both matter. Cycle time is the one that shows up in your day.
Hunter Road Force Elite and GSP9700 balancers measure road force variation as they balance. Coats 1250-3D is a 3D balancer. Typical price: $3,000 to $8,000 for a standard balancer. Road-force units typically $12,000 to $20,000.
4. Torque tooling
Calibrated, used every time, not an impact gun and a habit. This is where comebacks are made or avoided.
CDI 2503MFRMH is a 1/2-inch click-type torque wrench rated 30 to 250 ft-lb. Precision Instruments M2FR250H covers a similar lug-nut range. Snap-on and Matco sell torque-limiting extension bars for lug nuts. Typical price: $200 to $400 per wrench; torque sticks $50 to $150 each; calibration service typically $50 to $100 per tool per year.
5. Sensor tooling
Whether you can service tire pressure sensors reliably decides whether a common job is yours or somebody else's.
ATEQ VT56 reads and programs TPMS sensors. Bartec Tech600 is a similar scan and programming tool. Autel MaxiTPMS TS508 is a lower-cost handheld. Typical price: $200 to $300 for the Autel TS508; $800 to $1,500 for the ATEQ VT56; $1,000 to $1,800 for the Bartec Tech600.
6. Air and inflation
Volume for two bays, and inflation equipment appropriate for the work. A typical two-bay target is 18 to 25 CFM at 100 psi with a tank of 60 gallons or more, because recovery is what stalls a second bay.
Ingersoll Rand SS5L5 is a 5-HP, 60-gallon vertical compressor rated around 18 CFM at 100 psi. Quincy QT-5 is a 5-HP, 80-gallon unit rated around 18.6 CFM at 100 psi. Milton and PCL make locking inflator gauges. Typical price: $1,500 to $3,500 for a 5-HP, 60 to 80 gallon compressor; $50 to $150 for a locking inflator gauge.
7. Rack and staging (after the six)
Storage that lets a technician find and stage a set without leaving the bay area twice. JohnDow Industries makes tire storage racks for stacked sets. A wall-mounted rack from a supplier like JohnDow keeps the incoming set within sight of the lift. Typical price: $200 to $1,500 depending on capacity and mounting.
8. Everything else (after the six)
Alignment, road-force balancing, specialty tooling. These come after the base is reliably busy, judged against your own miss log. Hunter HawkEye Elite and John Bean V3D are alignment systems. A road-force balancer is already listed above. Typical alignment system price: $15,000 to $45,000 installed, depending on camera or 3D type and bay work.
Buy order that adds minutes
- Liftrated for heaviest vehicle
- Tire changerwheel-protection features
- Balanceraccuracy and cycle time
- Torque toolingcalibrated, used every time
- Sensor toolingreliable TPMS service
- Air and inflationvolume for two bays
- Rack and stagingfind and stage sets
Lay the bay out for the walk
The distance between the lift, the changer, the balancer and the tire rack gets walked several times per job, by every technician, all day. That is the most repeated cost in the building, and it never appears in a budget.
Bay layout for the walk
- Changer and balancer within one person's reach
- Staging area in sight of the lift
- Fixed home for torque tooling
- Customer path separate from working path
- Leave room to open a door
A simple two-bay arrangement puts the lift in the center of each bay, with the changer on the aisle side of the left bay and the balancer beside it. Both bays share one changer and one balancer. The rack sits on the back wall between them.
Lay the bay out
| Element | Placement | Typical distance to keep |
|---|---|---|
| Lift | Center of the bay, door side | 10 to 12 ft from the rack |
| Changer | Bay edge on the aisle side | 6 to 10 ft from the lift |
| Balancer | Beside the changer | 4 to 8 ft from the changer |
| Rack and staging | Back wall behind the lifts | 10 to 15 ft from each lift |
| Compressor | Outside the bay or in a closet | Short run to the first air drop |
Treat the distances as typical planning figures, then adjust them to your own bay depth and door position.
Walk order for one job: vehicle in and on the lift, wheels off to the changer, then the balancer, back to the lift, torque, then the rack or the trunk.
The safety program is part of the setup
A tire shop's hazards are specific: lifting equipment, noise, dust, chemicals and solvents, and floors that turn slick. OSHA's overview of hazards in automotive repair and refinishing work sets out the categories, a better starting point than a generic safety template written for an office.
Safety program essentials
- Short written procedure for lift use
- Rule on who may operate what
- Maintenance and inspection schedule
- Pre-use checksarms, locks, air lines, guards
- Visible out-of-service tag
The program does not need to be long. OSHA's material on running a workplace safety and health program describes the approach: find hazards and fix them before an injury or an inspection finds them for you.
In practice, that means a short written procedure for lift use and a rule about who may operate what. Add a maintenance and inspection schedule tied to the manufacturer's instructions, and a way for a technician to take a machine out of service without asking permission.
Two habits do most of the work.
Safety program setup
- Pre-use checks that take a minute.Lift arms, locks, air lines, machine guards. Written, initialed, kept.
- A visible out-of-service tag.A machine somebody suspects is unsafe should be unusable within seconds, without a discussion.
Maintenance, calibration and the machine that quietly drifts
A balancer that has drifted does not announce itself. It produces comebacks. So does a torque tool nobody has checked, and a changer whose bead-breaker has worn.
Maintenance and calibration schedule
- Set schedule from manufacturer instructions
- Record every completed service
- Put calibration procedures on the calendar
- Treat a missed one as a defect
- Watch comeback rate by service
Set the schedule from each manufacturer's instructions, not a general rule of thumb, and record that it was done. Where a machine has a calibration procedure, put it on the calendar. Treat a missed one as a defect, not a chore.
Watch your comeback rate by service. A sudden rise in vibration complaints is usually a machine, not a person.
On a used machine, ask two questions before you pay: are parts still available, and is there a service history you can check. A model with no parts channel turns a saving into a bay out of service.
Maintenance, purchase and warranty records are ordinary business records. The IRS guidance on what records a business should keep covers how to hold them.
Equipment decisions that follow from the menu
Equipment should follow the service menu, not lead it. If the menu does not include alignment, the machine is a hope rather than a plan. Which services belong on the menu at all, and what each costs in bay time and skill, is worked out in the services and packages guide.
The same is true of capacity. Whether a second lift pays depends on whether your trade area produces enough work to fill it, the counting exercise in the startup and market guide.
One more input belongs here. Fitment, sizing, load and speed markings, aging, and registration and recall handling come from the vehicle and tire makers. Current federal material sits at NHTSA's tire safety pages.
What your equipment must do around sensors and wheels you should not damage follows from those specifications, not from a machine's feature list.
Common questions
What is the minimum equipment to open?
A lift rated for the vehicles you will take, a changer that will not damage alloy wheels, a balancer, calibrated torque tooling, and air supply that keeps up. Everything past that should be justified by work you are already turning away.
Should the first purchase be new or used?
Downtime risk matters more than price. A used machine with available parts and a serviceable history can be a genuine saving. A used machine that takes a bay out of service for a week is not, and neither is one that marks wheels.
How much air capacity do we need?
A typical two-bay target is 18 to 25 CFM at 100 psi with 60 gallons or more of tank. Check it against the published draw of the tools you actually buy, add anything that runs continuously, and size for the shop you will be in two years.
Do we need road-force balancing?
Only if you are turning away or failing to solve enough vibration complaints to keep the machine busy. It is a real capability with a real cost, and the miss log tells you whether the demand exists.
When should we add an alignment machine?
When alignment work you currently refer out would fill the bay time the machine occupies, and when you have a technician who owns it. Buying it first and hoping for the work is the most common expensive mistake in a young shop.