Guides
Tire shop equipment checklist, from first line to sign-off
A tire shop equipment checklist for new owners: what to verify before each purchase, the building checks that come first, and the day-one safety items.
What to take away
- Verify the building before you order anything. A machine that will not fit or cannot be powered is a return, a delay and an empty bay.
- Check every purchase against one questiondoes this add sellable bay minutes or prevent a loss?
- The wheel-protection features on a changer are not an upgrade. One damaged alloy costs more than the difference.
- Buy calibrated torque tooling on day one. It is the cheapest comeback prevention available.
- Nothing goes into service without the manufacturer's instructions on file and one person trained to use it.
Before you order: the building
- Slab thickness and specification confirmed against the lift manufacturer's requirement, in writing.
- Ceiling clearance measured with a full-size vehicle at working height, not at rest.
- Bay door width and approach angle checked against the largest vehicle you intend to accept.
- Electrical service confirmed for the lift, compressor and machines together, not one at a time.
- Compressed air volume and recovery sized for two bays running at once, from the published tool requirements.
- Floor drainage and surface reviewed. Standing water and a slick finish are the two conditions that produce falls.
- Waste tire storage area identified and permitted for that use where you operate.
- Lighting adequate over the lift and at the changer, so a technician can see a sidewall clearly.
If any of the first three fail, stop and solve them. They are the constraints that cannot be worked around later.
Building checks before ordering
- Slab thickness confirmed in writing
- Ceiling clearance with vehicle at height
- Bay door width vs largest vehicle
- Electrical service for all machines
- Air volume for two bays
- Drainage and non-slip floor
- Waste tire storage permitted
- Lighting over lift and changer
Core equipment, with what to verify on each
- Lift.Rated capacity above the heaviest vehicle you plan to take. Installation instructions and slab requirement supplied. Locking mechanism demonstrated. Inspection schedule from the manufacturer.
- Tire changer.Wheel-protection features demonstrated on a wheel like the ones you will see. Bead-breaker condition checked. Parts availability confirmed with a supplier, not assumed.
- Balancer.Cycle time observed on a real wheel. Calibration procedure documented. Cone and adapter set matched to the wheels in your trade area.
- Torque tooling.Calibrated, with a documented calibration interval. Enough units that nobody has to wait for one, because waiting is how impact guns get used instead.
- Sensor tooling.Coverage checked against the vehicles you actually see. Update path and cost confirmed, since coverage without updates decays.
- Inflation equipment.Appropriate for the sizes and types you will handle, with the safety features intact.
- Jack, stands and wheel dollies.Rated, inspected, and enough of them.
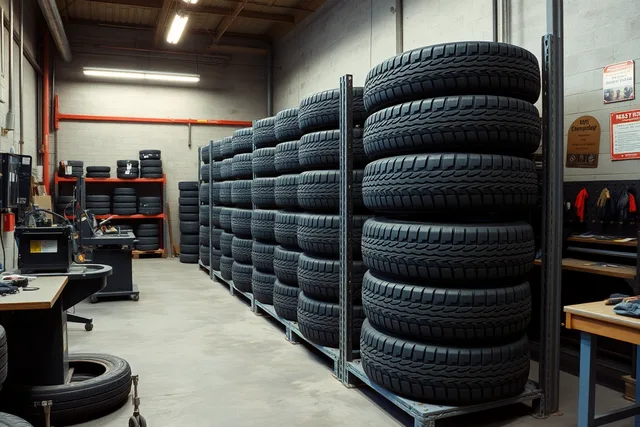
- Tire rack and staging.Positioned so a set can be staged without crossing a vehicle path.
Safety items that belong on day one
- Written lift operating procedure, short enough to be read.
- Out-of-service tags, and a rule that anyone may apply one without asking.
- Eye and hearing protection available at the point of use, not in a cupboard.
- Ventilation adequate for the chemicals and dust the work produces.
- Fire extinguishers sited and inspected.
- First aid supplies and a posted emergency procedure.
- A pre-use check sheet for the lift and machines, initialed daily.
Design around the hazards OSHA documents for automotive repair and refinishing work: chemicals and solvents, dusts, noise, lifting equipment, cutting tools and slippery walking surfaces. Build the program around those, not a generic template.
OSHA's material on establishing a safety and health program describes the program's shape, short by design: find hazards, fix them, and check that the fix held.
Documentation to collect at purchase
Collect these while the vendor is still motivated to help.
Documents to collect at purchase
- Operating and maintenance instructions
- Lift installation certification
- Warranty terms and claim process
- Parts availability and lead time
- Calibration procedures and intervals
- Training records for operators
A machine without its instructions on file cannot be maintained to the manufacturer's schedule, and "we do it the way the last guy did" is not a maintenance program.
What to defer
Resist these until the bay is reliably full and your miss log justifies them.
What to defer until demand justifies
Is the bay reliably full and the miss log clear?
buy alignment, road-force balancing, second lift
defer and refer specialty work out
- Alignment equipment. Highest cost, highest skill floor, longest bay time.
- Road-force or high-precision balancing. Real capability, real cost, and only worth it if vibration work is arriving faster than you can solve it.
- A second lift ahead of a second technician. Capacity without a person is floor space.
- Specialty tooling for vehicles you see once a month. That is a referral.
Which of these eventually earns its place follows from the demand in your area, and the counting behind that judgment sits in the market and expansion guide. Some equipment also carries a permitting or inspection obligation where you operate, which is a separate check covered in the licensing and compliance guide.
Before the first customer
- Every machine has one named person trained on it, with the training recorded.
- Torque specification reference available at the bay, from the vehicle manufacturer.
- Written policy on what your shop will and will not repair, drawn from the manufacturer's instructions and published industry repair guidance.
- Wheel condition documented before work starts, with a way to show the customer.
- Fitment and safety references to hand, including the current federal tire safety guidance for sizing, markings, aging, registration and recall questions.
Getting the crew to a consistent standard on all of this is its own exercise, set out in the hiring and training guide. The reasoning behind the buying order, and how the bay should be laid out around it, is in the equipment and setup guide.
Common questions
What does this list cost?
Nothing on this page can tell you, because lift capacity, changer class and local installation costs vary widely. Price your own list from at least two suppliers and include installation, which is regularly underestimated.
Can I skip the balancer at first?
No. Fitment without balancing produces complaints immediately, and a comeback consumes bay time you already sold. It is core equipment, not an option.
Is one lift enough?
For a single-technician shop, yes, with strict scheduling. The problem with one lift is not capacity in the abstract, it is that one long job stops everything queued behind it.
How do I check a used machine before buying?
Watch it run a complete cycle on a wheel like yours. Ask for the maintenance history and the manufacturer's instructions. Confirm wear parts are still available. If any of those three is missing, treat the price as higher than quoted.
What is the most commonly skipped item?
Calibrated torque tooling. It is inexpensive next to everything else on this page and it prevents the two failures a customer notices most: a wheel that comes loose and a warped brake complaint that follows an overtightened one.